Paint Pen for Stone Chip Repair
💧 Paint Pen for Stone Chip Repair
Paint pipette for repairing stone chips on your car
Difficulty
Easy
Time
15min per Chip
Cost
€30
Savings
Preserves Car Value
Tools
Polishing Tools
🎬 Video Tutorial
🛒 Matching Product for This Video
[dasauto_product id=“368867″]
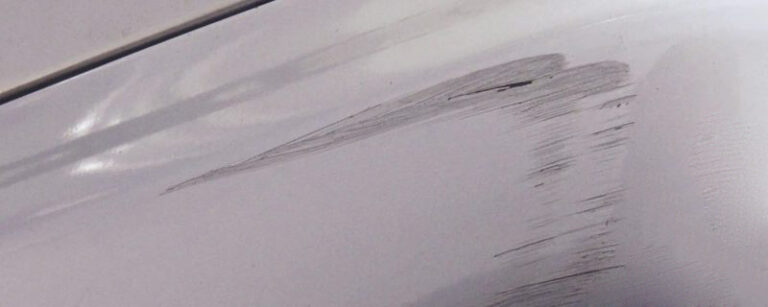
⚠️ The Problem
Stone chips – usually on bumper, grille, hood, front edge of roof; Stone impact chips off the paint and leaves a crater. The damaged, unprotected area must be sealed again, otherwise it will rust within a short time.
Paint pipette for stone chips – The method of repairing stone chips with a paint pipette was developed by dasAuto and is completely new. All previous methods for fixing typical stone chips on hood and front end don’t produce truly satisfactory results. The innovation in this area is the paint pipette.
Precise dosing is possible through the tiny opening of the pipette (0.2 mm). The paint pipette is offered in combination with the touch-up pen. dasAuto exclusively uses quality acrylic paints from Glasurit. Every color shade is mixed exactly according to the color code from the vehicle manufacturer and filled for you.
Here’s How:
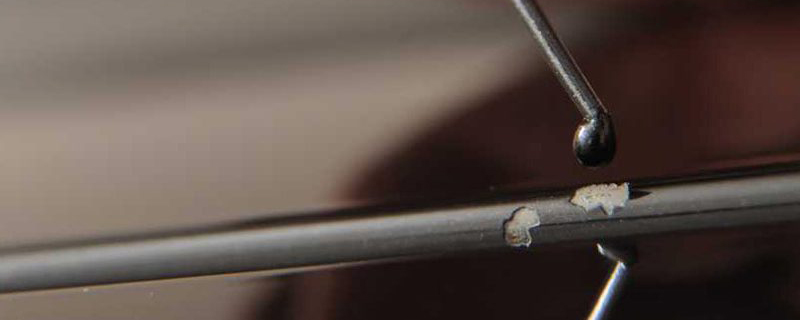
Remove Rust
Remove the rust! All loose and protruding paint and rust particles must be scraped off and removed with a pointed object.
Thoroughly clean the damaged area with silicone remover from grease and silicone as well as paint and rust particles.
Apply Paint
Shake the proven touch-up pen well for two minutes, the ball must hit audibly, open the screw cap, wipe off the brush well and set aside.
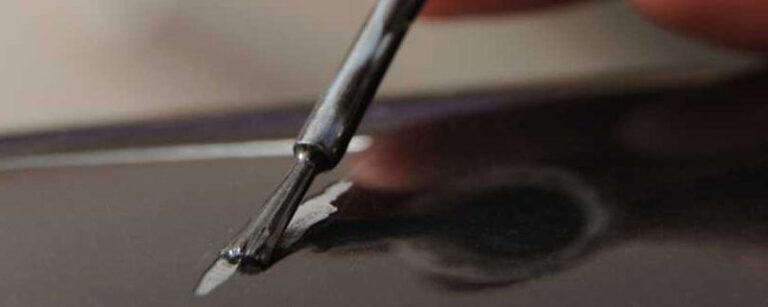
Now the pipette comes into play. Squeeze the pipette at the top and dip it to the bottom of the bottle.
Release the bulb and the pipette fills with paint. The tiny opening of the pipette – 0.2 mm – allows precise dosing of the paint quantity and pinpoint repair.
Unlike the touch-up pen, the paint is not brushed, but dripped in.
The crater is thereby slightly overfilled so that the base coat distributes evenly in the stone chip. This also completely seals the cracked edges.
About a third of the filled paint quantity is solvent and evaporates. This creates space for the final clear coat.
💡 Pro Tip
For typical stone chips that cause deep craters, the paint pipette is ideal.
The paint is not brushed, but dripped in and thus seals the crater air- and watertight.
Sanding and Clear Coat
Now the excess base coat that is still on the outer edge of the crater due to overfilling must be removed. For this, the included sanding block is wrapped with the matching wet sandpaper – grit P2000. With lots of water and light pressure, sand off the excess base coat in circular motions.
Without the sanding block, there’s a risk of removing the dripped paint in the crater as well.
Check the result in between.
Now drip the clear coat onto the cleaned and dry area and clearly overfill.
The clear coat must fill and seal every tiny crack.
⚠️ Warning
Be sure to allow a drying time of two days. The clear coat must be fully cured to sand well.
Sanding and Polishing
This protective clear coat layer, cured for at least 2 days, is again carefully taken down to a slightly raised level with lots of water, sanding block and wet sandpaper – grit P2000.
This small but important overfill ensures a 100% tight seal.
The surface made matte by sanding is now polished multiple times and brought to high gloss.
You won’t always succeed in making the paint damage completely invisible.
But this new repair method allows a first-class result. Not only optically perfect, but also absolutely air and watertight. Without oxygen, no oxidation – rusting is no longer possible.